

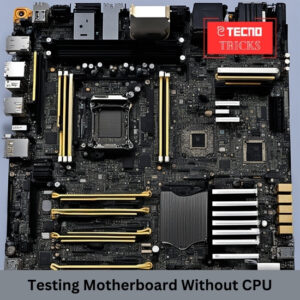
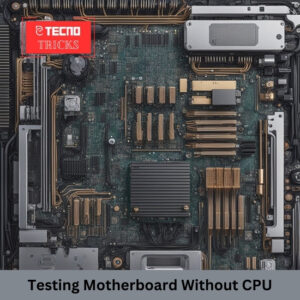
Dispelling the Myth: Testing Motherboard Without CPU
So, you might have heard that testing a motherboard without a CPU is near impossible, right? Well, let me tell you something: that’s not entirely true. While it might seem counterintuitive at first, there are actually several methods you can employ to check the functionality of your motherboard even without the CPU installed. In this blog post, we’re going to dive deep into why this is important, understanding the need for motherboard testing without a CPU, and explore various methods to do just that. So, let’s bust this myth wide open and get to the truth!
Understanding the Need for Motherboard Testing
Have you ever experienced that sinking feeling when your computer just won’t turn on, and you suspect it’s the motherboard acting up? Yeah, we’ve all been there. When your PC refuses to boot or starts exhibiting strange behavior, the motherboard is often the first suspect. Now, imagine being able to diagnose and potentially fix motherboard issues without even touching the CPU. Pretty neat, huh? That’s why understanding the need for motherboard testing without a CPU is crucial for any PC enthusiast or troubleshooter.
Testing Motherboard Without CPU: Methods Unveiled
Now, let’s get into the nitty-gritty of how you can actually go about testing your motherboard without the CPU. You might be thinking, “But isn’t the CPU essential for the motherboard to function?” Well, yes and no. While the CPU is indeed a critical component, there are ways to perform basic diagnostics without it. So, let’s roll up our sleeves and explore some ingenious methods to test your motherboard sans CPU.
1. Visual Inspection:
One of the simplest methods is to conduct a visual inspection of your motherboard. Look for any signs of physical damage such as burnt capacitors, discolored areas, or bent pins. These visual cues can often indicate underlying issues that may be affecting your motherboard’s performance.
2. Component Testing:
Another approach is to test individual components on the motherboard without the CPU. This involves removing unnecessary peripherals such as RAM, GPU, and storage devices, and then powering on the motherboard. By systematically testing each component, you can isolate the source of any potential problems.
3. BIOS Testing:
You can also perform basic BIOS testing without the CPU. By accessing the BIOS/UEFI interface, you can check for any error messages or anomalies that may indicate motherboard issues. Additionally, some motherboards have built-in diagnostic tools that can help identify hardware problems.
4. External Testing:
If you have access to spare components, such as a compatible CPU or power supply, you can perform external testing of the motherboard. This involves connecting the essential components outside of the case to rule out any potential issues with other hardware components.
By employing these methods, you can effectively test your motherboard without the CPU and pinpoint any underlying issues. So, don’t let the absence of a CPU hold you back from diagnosing and resolving motherboard-related problems!
You might be scratching your head, wondering how exactly you can go about testing your motherboard without a CPU. Well, worry not, because I’ve got you covered with a step-by-step guide that will walk you through the process. Contrary to popular belief, it’s not as complicated as it sounds. So, let’s dive right in and get started on diagnosing your motherboard issues like a pro!
5. Prepare Your Workspace:
Before you begin, make sure you have a clean and well-lit workspace. Remove any unnecessary clutter and ensure you have all the tools and components you’ll need for the testing process.
6. Disconnect Power Supply:
First things first, disconnect the power supply from your motherboard and other components to avoid any electrical mishaps. This is a crucial safety precaution that should not be overlooked.
7. Remove CPU and Other Components:
Carefully remove the CPU from its socket, along with any other unnecessary components such as RAM, GPU, and storage devices. This will ensure that only the motherboard remains for testing.
8. Connect Power Supply and Monitor:
Next, reconnect the power supply to the motherboard and connect a monitor to the appropriate port. This will allow you to observe any error messages or anomalies during the testing process.
9. Power On the Motherboard:
Now, it’s time to power on the motherboard and observe its behavior. Look for any signs of life such as LED lights turning on, fans spinning, or beeping sounds indicating successful POST (Power-On Self-Test).
10. Monitor BIOS/UEFI Interface:
Access the BIOS/UEFI interface if possible and check for any error messages or anomalies that may indicate motherboard issues. Some motherboards have built-in diagnostic tools that can provide valuable insights.
By following these steps, you can effectively test your motherboard without a CPU and identify any underlying issues that may be affecting its performance. So, don’t let the absence of a CPU stop you from troubleshooting like a pro!
You might be scratching your head, wondering how exactly you can go about testing your motherboard without a CPU. Well, worry not, because I’ve got you covered with a comprehensive guide that will walk you through the process. Contrary to popular belief, it’s not as complicated as it sounds. So, let’s dive right in and explore the various methods you can use to diagnose your motherboard issues like a pro!
Visual Inspection:
One method you can employ is a visual inspection of your motherboard. This involves carefully examining the board for any signs of physical damage, such as burnt capacitors, discolored areas, or bent pins. Visual inspection can often provide valuable insights into the health of your motherboard and help you identify potential issues.
Pros:
Visual inspection is relatively straightforward and does not require any special tools. It can quickly identify obvious signs of damage or wear, allowing for prompt action to be taken.
Cons:
However, visual inspection may not always reveal underlying issues that are not immediately visible. It also relies heavily on the observer’s ability to recognize signs of damage accurately.
Component Testing:
Another method is component testing, where you systematically test individual components on the motherboard without the CPU installed. This involves removing unnecessary peripherals such as RAM, GPU, and storage devices and then powering on the motherboard to isolate the source of any potential problems.
Pros:
Component testing allows for a more targeted approach to troubleshooting and can help pinpoint specific hardware issues. It can be particularly useful for identifying faulty RAM modules or expansion cards.
Cons:
On the downside, component testing can be time-consuming and requires careful handling of sensitive hardware components. It may also require access to spare components for testing purposes.
BIOS Testing:
You can also perform basic BIOS testing without the CPU. By accessing the BIOS/UEFI interface, you can check for any error messages or anomalies that may indicate motherboard issues. Some motherboards even have built-in diagnostic tools that can provide additional insights into hardware problems.
Pros:
BIOS testing is relatively simple and can be performed without the need for any additional hardware. It can quickly identify common hardware issues such as memory errors or CPU overheating.
Cons:
However, BIOS testing may not always provide conclusive results, especially for more complex hardware issues. It also requires access to the BIOS/UEFI interface, which may not be available in all situations.
External Testing:
If you have access to spare components, such as a compatible CPU or power supply, you can perform external testing of the motherboard. This involves connecting the essential components outside of the case to rule out any potential issues with other hardware components.
Pros:
External testing allows for thorough testing of the motherboard in a controlled environment. It can help identify hardware compatibility issues and isolate problems more effectively.
Cons:
External testing may not always be feasible, especially if you do not have access to spare components. It also requires careful handling of sensitive hardware components and may void warranties if not done correctly.
Verdict:
In conclusion, testing your motherboard without a CPU is entirely feasible and can be done using a variety of methods. Each method has its pros and cons, and the best approach will depend on your specific situation and available resources. Whether you opt for visual inspection, component testing, BIOS testing, or external testing, taking the time to diagnose your motherboard issues properly can save you time and frustration in the long run. So, don’t let the absence of a CPU hold you back from troubleshooting like a pro!
Frequently Asked Questions (FAQs)
Q: Can I really test my motherboard without a CPU? A: Absolutely! While it might sound surprising, there are several methods you can use to test your motherboard without a CPU installed. It’s a handy trick for diagnosing hardware issues and ensuring your rig is running smoothly.
Q: Why would I need to test my motherboard without a CPU? A: Testing your motherboard without a CPU can be necessary when troubleshooting hardware issues, especially if your PC refuses to boot or exhibits strange behavior. It allows you to isolate motherboard problems and take appropriate action.
Q: What are the benefits of visual inspection? A: Visual inspection is a quick and easy way to identify obvious signs of damage or wear on your motherboard. It can help you pinpoint potential issues and take prompt action to address them, saving you time and frustration in the long run.
Q: Is component testing difficult to do? A: While component testing may sound intimidating, it’s actually quite straightforward. By systematically testing individual components on the motherboard, you can isolate the source of any potential problems and take appropriate action to resolve them.
Q: Can BIOS testing really help identify motherboard issues? A: Yes, BIOS testing can be a valuable tool for identifying common hardware issues such as memory errors or CPU overheating. By accessing the BIOS/UEFI interface, you can check for error messages or anomalies that may indicate motherboard problems.
Q: Do I need access to spare components for external testing? A: Yes, external testing typically requires access to spare components such as a compatible CPU or power supply. However, if you have access to these components, external testing can be a thorough and effective way to diagnose motherboard issues.
Q: Are there any risks involved in testing my motherboard without a CPU? A: While testing your motherboard without a CPU is generally safe, it’s essential to take appropriate precautions to avoid damaging sensitive components. Make sure to disconnect the power supply and handle components with care to minimize the risk of accidents.
Q: What if I’m still unsure how to test my motherboard? A: If you’re still unsure how to test your motherboard or diagnose hardware issues, don’t hesitate to reach out for help. There are plenty of online resources and forums where you can seek advice from experienced PC enthusiasts and professionals.
Q: Can testing my motherboard without a CPU void my warranty? A: It’s unlikely that testing your motherboard without a CPU will void your warranty, as long as you follow proper procedures and don’t cause any damage in the process. However, if you’re unsure, it’s always best to check with the manufacturer or retailer beforehand.


